Tower of Gand Boss Guide — Strategies for Every Boss Fight
Tower of Gand features a gauntlet of punishing boss encounters scattered across its ever-shifting dungeon floors. With permadeath looming over every decision, understanding each boss's attack patterns, phase transitions, and class counters is the difference between ascending the Tower and losing everything.
Reading Attack Patterns and Exploiting Openings
Every boss in Tower of Gand follows distinct attack sequences that telegraph their next move. Learning to recognize these patterns is essential in the turn-based combat system, where choosing the wrong defensive action can end a run instantly. Bosses typically open with a signature charge or heavy strike on the first turn — preparing a guard or evasion ability before the fight begins can neutralize this predictable opener and give you an early advantage.
After their opening salvo, most bosses cycle through combo chains of two to four actions. Pay close attention to delayed attacks within these chains: some bosses will pause for a turn before unleashing a devastating slam or sweep, baiting you into wasting a defensive cooldown too early. The key is patience — wait for the full combo to resolve, then capitalize on the recovery window that follows with your strongest offensive abilities.
Certain bosses punish healing aggressively. If you attempt to restore HP at the wrong moment, they will interrupt with a ranged attack or counter ability. Time your healing during confirmed safe windows, such as immediately after a boss completes a heavy combo chain, rather than reactively when your health drops low.
Phase Transitions and Escalation
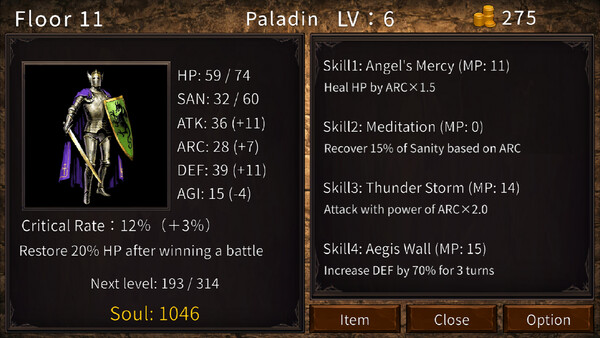
Nearly every boss in the Tower transitions into a more dangerous phase once their health drops below a critical threshold. These transitions often introduce entirely new attack types — area-of-effect abilities, summoned minions, or environmental hazards that reshape the battlefield. When you see a boss shift stance or the dungeon panel changes appearance, immediately switch to a defensive posture until you identify the new pattern.
Some bosses summon additional enemies during their later phases. These adds must be managed carefully: ignoring them lets damage pile up and erodes your sanity through the madness system, but focusing them exclusively allows the boss to unleash uncontested attacks. The optimal approach is to use crowd-control abilities from classes like the Hexbinder or Warden to suppress adds while maintaining pressure on the boss itself.
A few elite bosses require you to defeat them and their summoned counterpart within a narrow window of turns. If one falls too far ahead of the other, the surviving entity will regenerate a significant portion of its health. Coordinate your damage output carefully, and save burst abilities for a synchronized finishing blow on both targets.
Recommended Classes and Team Composition
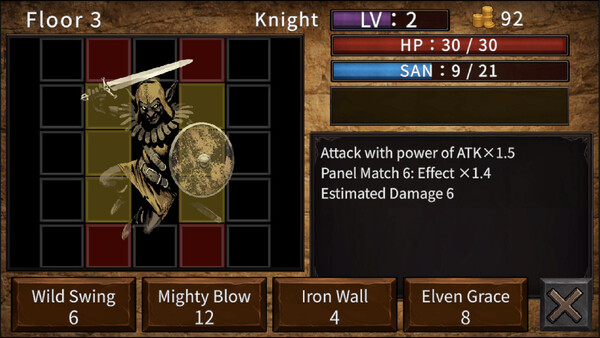
With over 40 classes available, team composition before a boss encounter is one of the most impactful decisions you can make. Tanking classes that can draw aggro and absorb hits — such as the Ironclad or Bulwark — are critical for keeping fragile damage-dealers alive through multi-hit combo chains. A dedicated tank can also pin down mobile bosses that attempt to reposition for ranged attacks, keeping them locked into melee range where they are more predictable.
Support classes that manage the madness mechanic are often undervalued but can determine whether a run survives a prolonged boss fight. Sanity erosion accelerates during boss encounters, and losing mental stability mid-fight can trigger disastrous status effects. Classes with sanity restoration or madness resistance buffs provide a safety net that pure damage compositions lack.
For raw damage output, prioritize classes with fast, reliable attacks over slow heavy-hitters. Bosses with tight recovery windows reward quick strikes that can fit into small openings, and faster classes can also squeeze in a counter-attack between phases of a boss combo before needing to defend again. Pairing a fast attacker with a class that can debuff boss defenses creates a synergy that dramatically shortens fights — and shorter fights mean less exposure to permadeath.
Positional Strategy and Boss Mobility
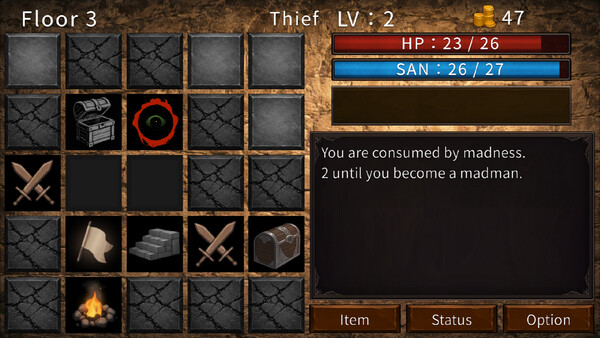
Several Tower of Gand bosses are highly mobile, circling the battlefield or charging across the 5×5 panel grid to close distance. These mobile bosses can be difficult to read because their movement patterns blend into their attack animations. Watch for bosses that circle repeatedly before suddenly lunging with a side-strike — the circling itself deals no damage but is designed to disorient your defensive timing.
Positioning your party to corner or funnel a mobile boss limits their movement options and forces them into shorter, more predictable attack chains. Use terrain features revealed on dungeon panels to your advantage: backing a boss against an obstacle prevents retreat into ranged attack mode and keeps the fight on your terms. Classes with pull or root abilities are invaluable for locking down bosses that try to create distance after their melee combos.
General Tips for Boss Survival
Always enter a boss fight with your defensive cooldowns available. It can be tempting to use crowd-control abilities on the final enemies before a boss panel, but arriving at the boss with key skills on cooldown is one of the most common causes of first-turn deaths. Clear pre-boss encounters efficiently and conserve your strongest tools for the main event.
Study each boss across multiple attempts. Because Tower of Gand's dungeon layout changes every run, you may not encounter the same boss frequently, making each fight a valuable learning opportunity. Take note of combo sequences, phase transition thresholds, and which of your class abilities created safe openings. Even a failed run provides knowledge that makes your next encounter significantly more manageable.
Finally, do not underestimate the madness system during extended boss fights. Sanity loss accumulates faster than many players expect, and the debuffs from high madness can cripple your combat effectiveness at the worst possible moment. Carry sanity-restoring items into boss encounters and use them proactively rather than waiting until madness effects begin to stack.